Project Setup - Marker Types
How to create and configure stakeholder Marker Types or Information Markers
This guide describes the creation and configuration of the Marker Types used by the public to leave a comment and used by Administrators to present information (Info Markers).
To add new or configure your existing Social Pinpoint comment markers:
-
Log in to your Social Pinpoint Admin site
-
Follow the guide below to configure the various settings and options.
Log in to your Social Pinpoint Admin site
Follow the guide below to configure the various settings and options.
Select a project or create a new one from the Welcome Screen.
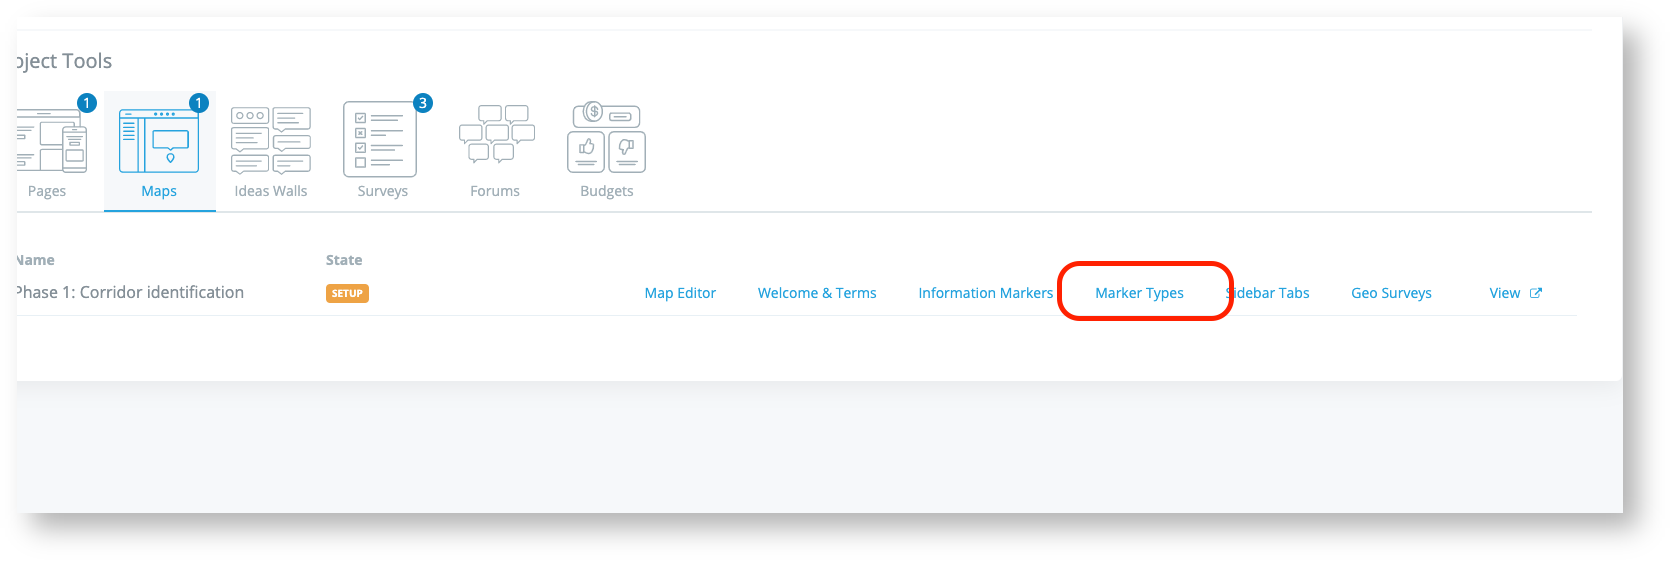
From your Setup screen, select 'Marker Types'.
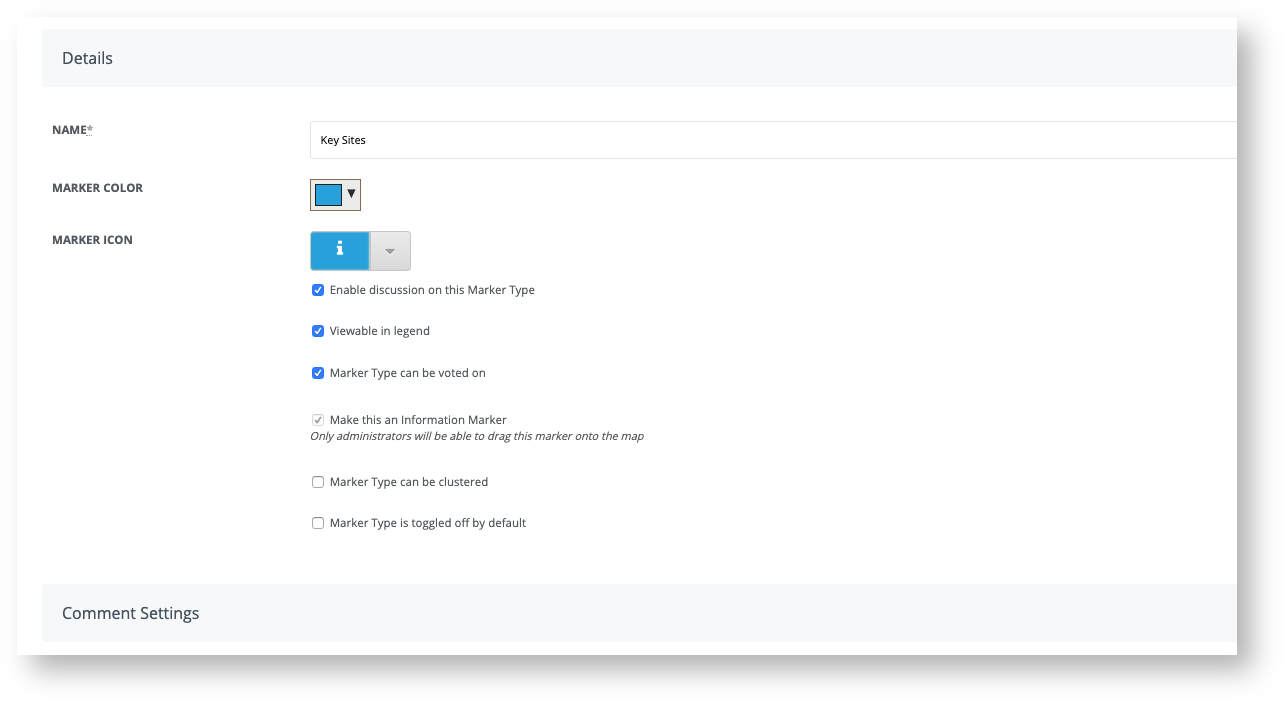
Details
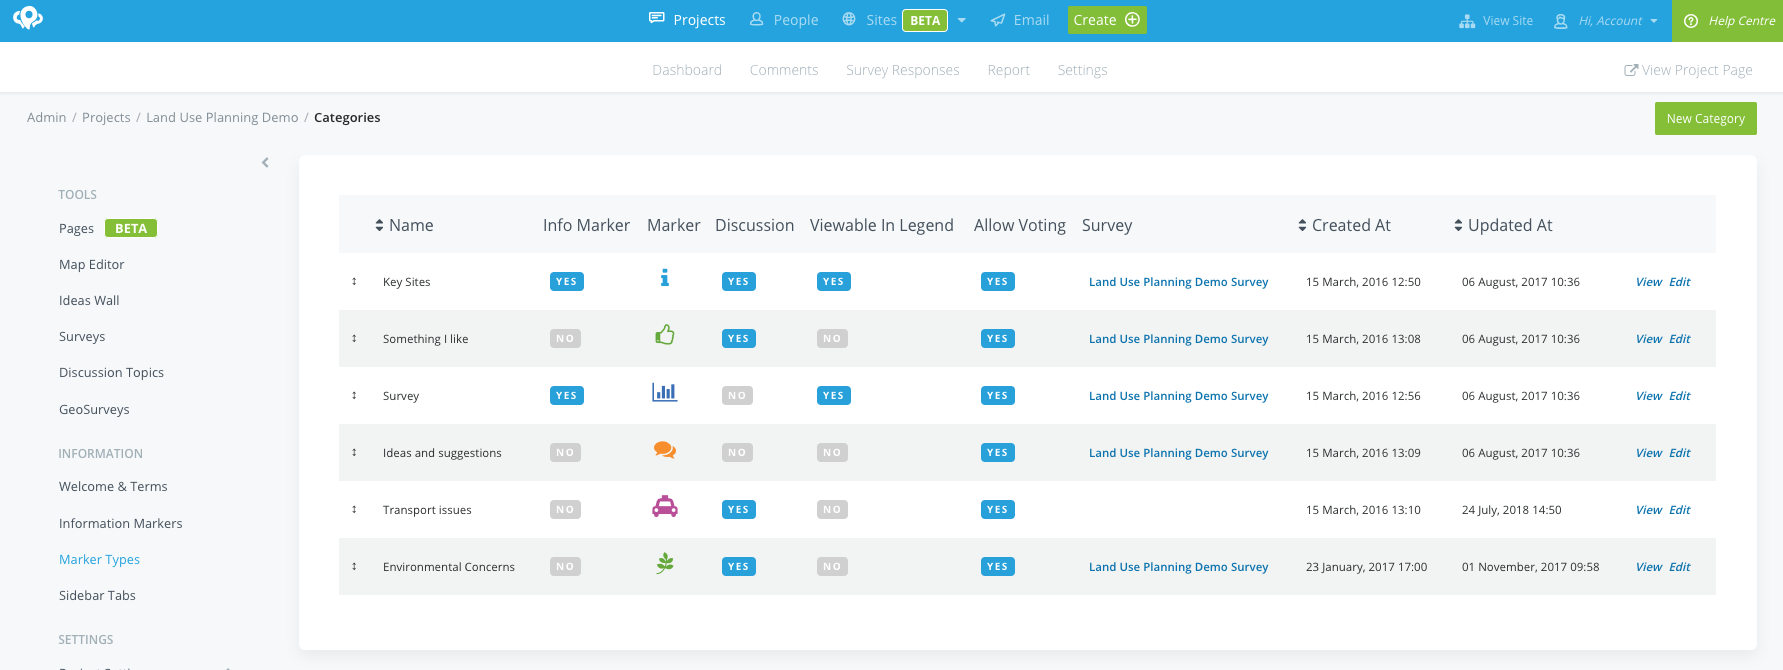
Select 'New Category'
Name: Enter a Name for the Marker, a brief one or two word description of the type of comments you are aiming to receive. This can be left generic eg. 'Something I Like' or specific such as 'Disabled Access' if you want to prompt for comments on a specific topic.
Marker Colour: Select from the palette of available colours. *Note: users with the Social Pinpoint Professional Package Addon will have access to fully customisable colour options.
Marker Icon: Select the marker icon from the list shown.
Enable Discussions on this Marker: Allow users to continue the discussion on a particular comment
Viewable in legend: Make visible in legend
Marker Type can be Voted on: Allow users to like/dislike the comment
Make this an Information Marker: Turn this marker into a static point of interest on the map that users can interact with (Users will not be able to drop these markers on the map)
Marker Type can be clustered: Enable the Marker Type to be able to be clustered if there are a large amount of Markers to go on a map
Marker Type can is toggled off by default: By selecting this the Marker Type will be toggle off by default
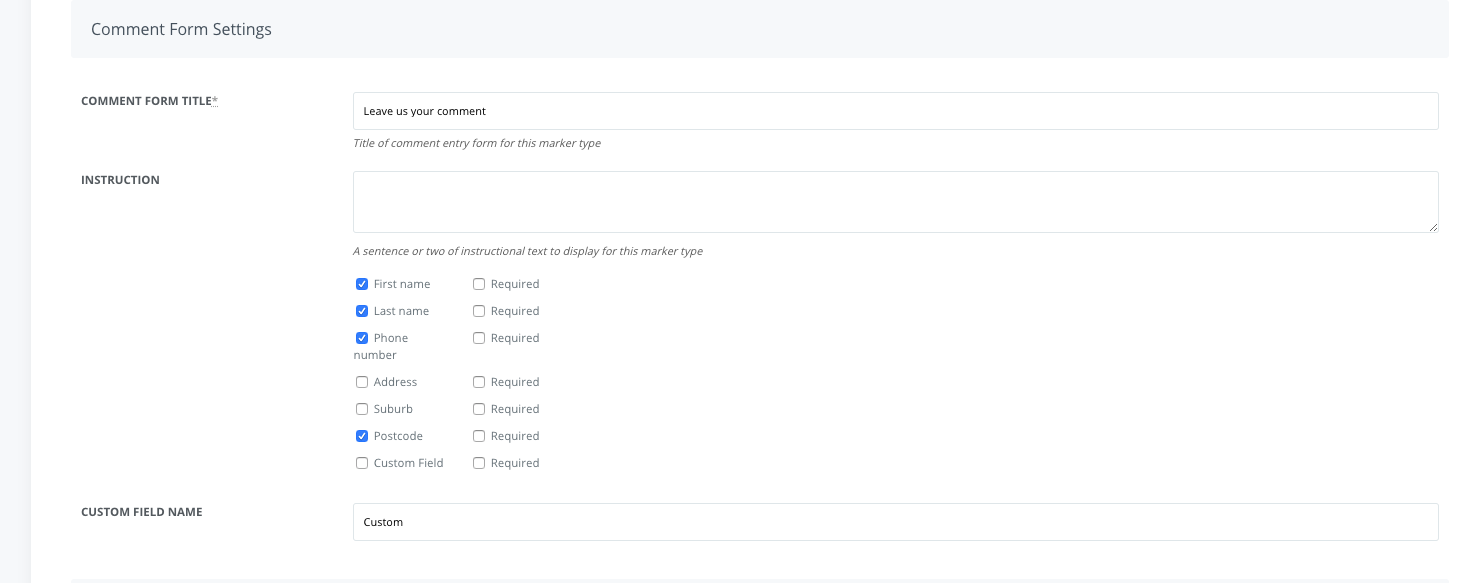
Comment Form Settings
Comment Form Title: Title of the comment entry form for the Marker Type you are editing.
Instruction: A brief line of instruction on the type of feedback you are requesting from your community or stakeholders; example: 'Council is requesting feedback on Disabled Access in this area. Please leave us a comment about ideas or improvements related to disabled access'.
Select the stakeholder information fields that you wish to display on the comment entry form. Tick the 'Required' option for mandatory fields.
Custom field name can be used to add your own field to the entry form. Enable by ticking the 'Custom Field' option then enter a name for your field.
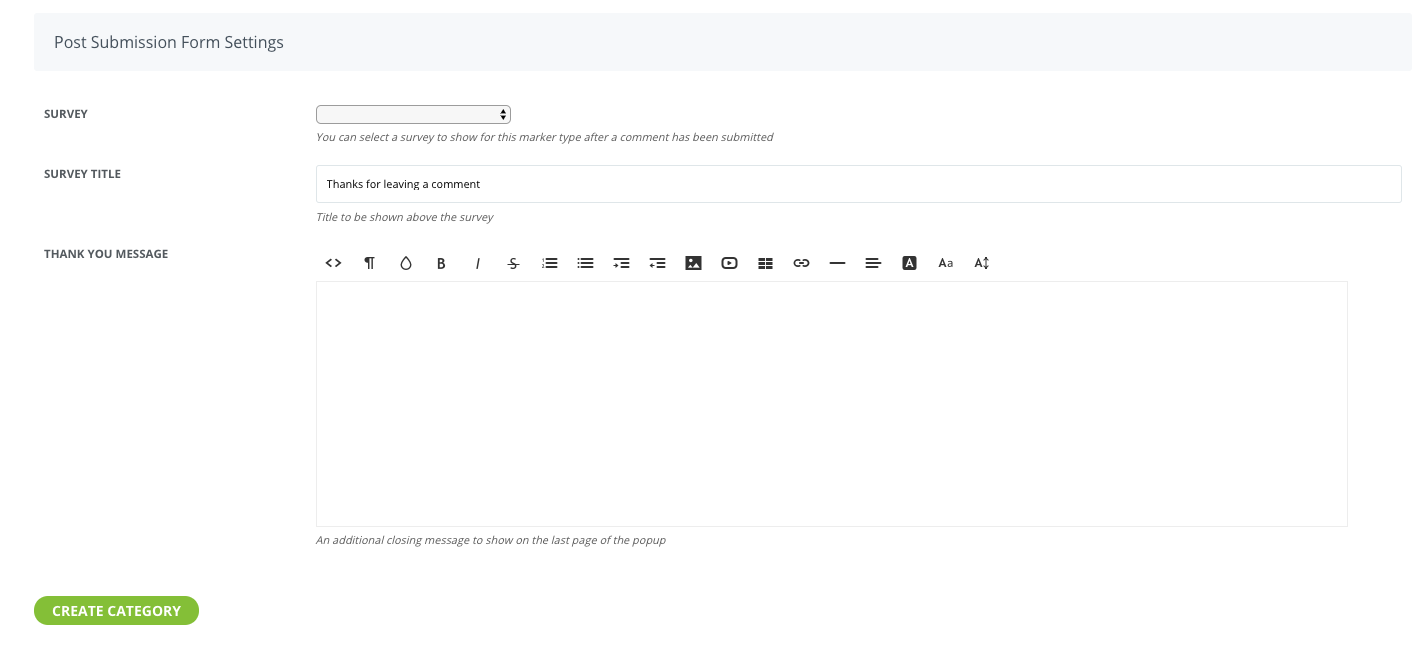
Post Submission Form Settings
Survey: Select the survey for the user to fill out after leaving a comment.
Survey Title: Title of the survey screen shown after leaving a comment
Survey message: Small message to display on the survey screen just above the survey
ℹ️ If Users do not have to submit the survey and just close the popup option is ticked, the user will be able to see the survey screen but will have the option to exit if they do not wish to fill in the survey. Un-tick this if you want the survey to be mandatory.
Thank you Message: A message (that supports HTML, images etc.) that can be displayed after the comment (and optionally survey) is submitted
Social Pinpoint allows you to configure Information Markers that can only be selected/ dragged onto the map by Administrators when logged into the system and are useful for displaying information related to key areas on the map. Example uses may include:
-
Show proposed changes (including images) to a place, building, road etc
-
Display information or images related to and existing space, building, road etc within the project area
-
Communicate information about upcoming projects or events
Show proposed changes (including images) to a place, building, road etc
Display information or images related to and existing space, building, road etc within the project area
Communicate information about upcoming projects or events
MARKER TYPES - Info Markers
Select 'New Category'
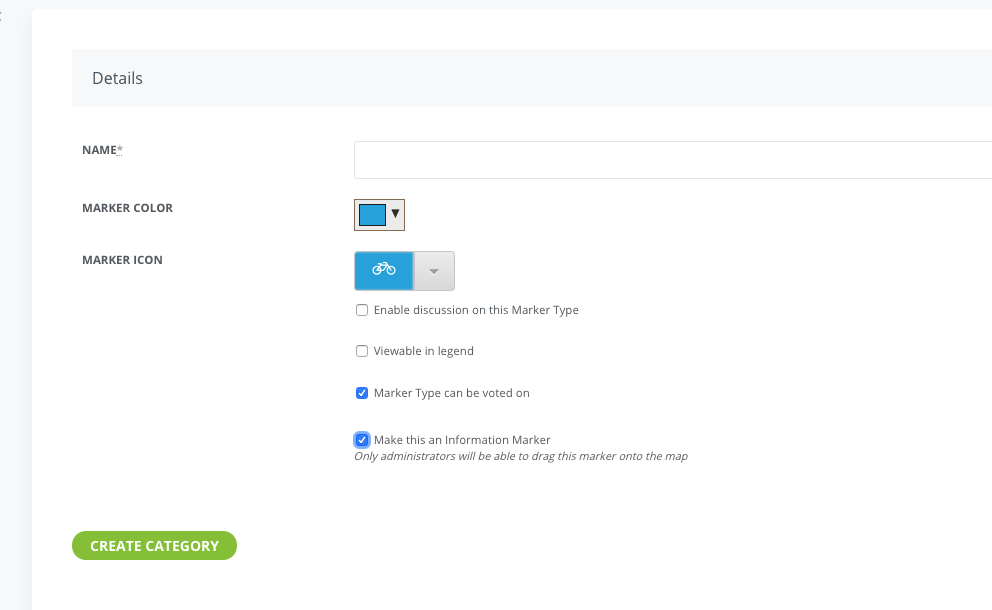
Name: Enter a name for the Info Marker example: 'Info'
Marker Colour: Select from the list of available colours
Marker Icon*: Select the marker icon from the list shown.
-
Enable discussion: Allows users to start discussions on this Marker Type.
-
Viewable in legend: Selecting this option displays the marker icon and name in the map legend.
-
Marker type can be voted on: users are able to like/dislike the information in the marker popup
-
Make this an Information Marker: Tick this option to enable the Info Marker type
Enable discussion: Allows users to start discussions on this Marker Type.
Viewable in legend: Selecting this option displays the marker icon and name in the map legend.
Marker type can be voted on: users are able to like/dislike the information in the marker popup
Make this an Information Marker: Tick this option to enable the Info Marker type
*Note: if you would like a specific icon that is not in the list please contact Social Pinpoint to request and update.
Once configured, Info Markers will be displayed as a toggle option in the Marker tool-bar on your Social Pinpoint project map click this to add an Info Marker (toggle will be to the right).
You must be logged into the site as an Administrator to view the Info Marker Types - the general public does not have access to view this toggle or drag Info Markers onto the map.
To use; simply drag the Info Marker to a desired area on the map and complete the form as shown. Photos/videos can be uploaded if required.

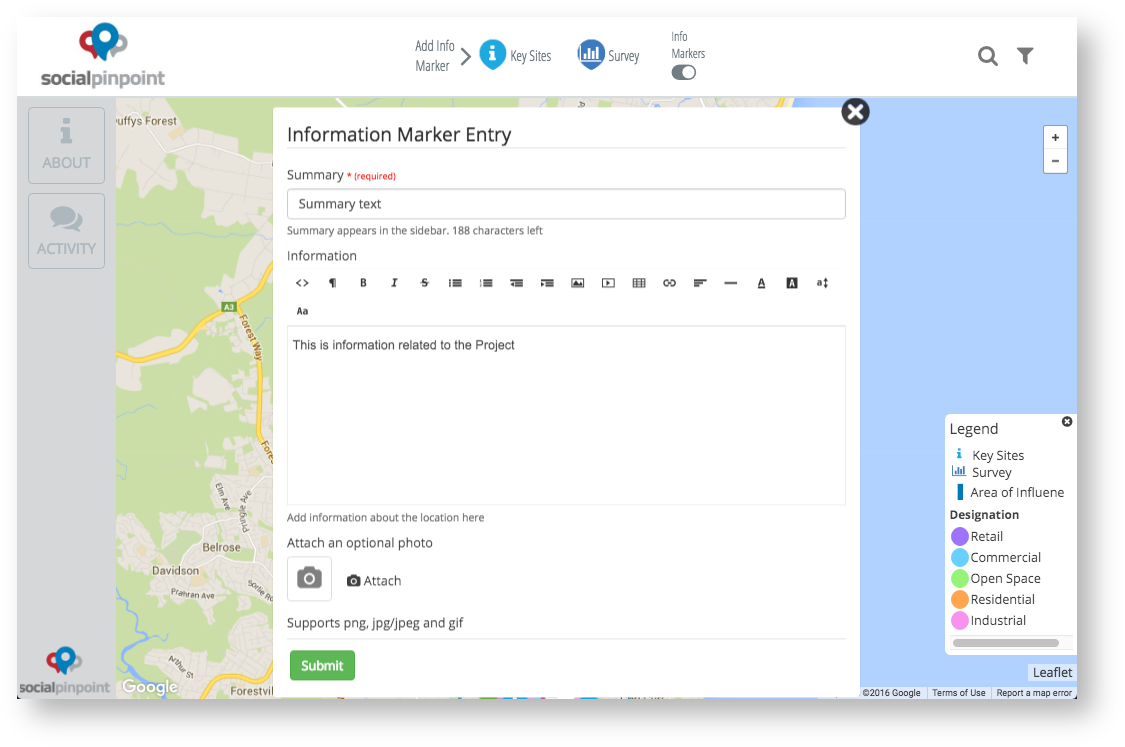
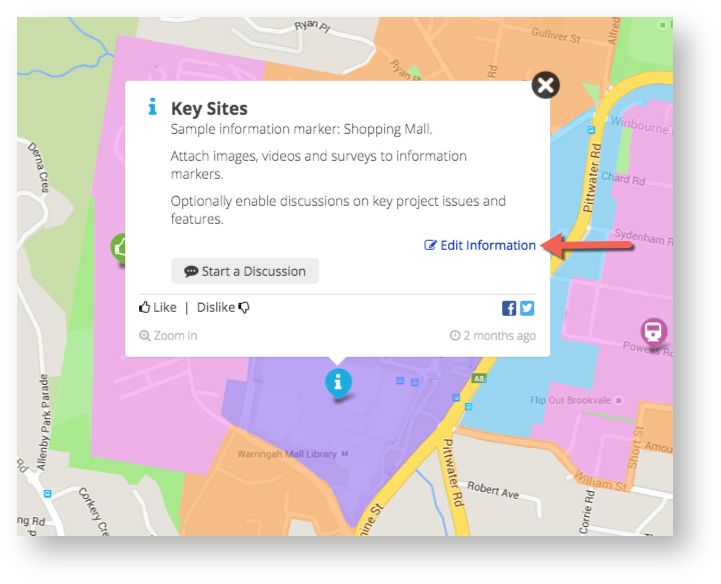
Once submitted; Admin users logged into the system will see and 'Edit Information' link when they click on and Admin Marker on the map.
Clicking this link opens the Edit Info Marker interface as shown below.
Click 'Information Markers' in the left Information Settings Menu
Edit Info Marker - use this interface to edit the content and images associated with an existing Information Marker.
Summary: This is a short summary which will only appear in the Social Pinpoint Activity Feed toolbar. Please copy and paste the summary text if you would like it to also be available in the marker pop-up.
Markertype: Select to change the Marker category if required.
Survey: Add an existing Survey to be displayed on your marker pop-up. See Project Setup - Surveys for Survey configuration instructions.
Body: The main information content to be displayed. Use the text editor toolbar to format content as required. When inserting images re-size as required, width limitations apply. In most cases images should be added using the Photo Options below.
Published at: This shows the date and time the Marker was added. Change to re-order markers in the Activity Feed; most recent date and times are shown at the top of the list. Setting this to a 'future' date will pin the entry to the top of the list and the date added will be hidden.
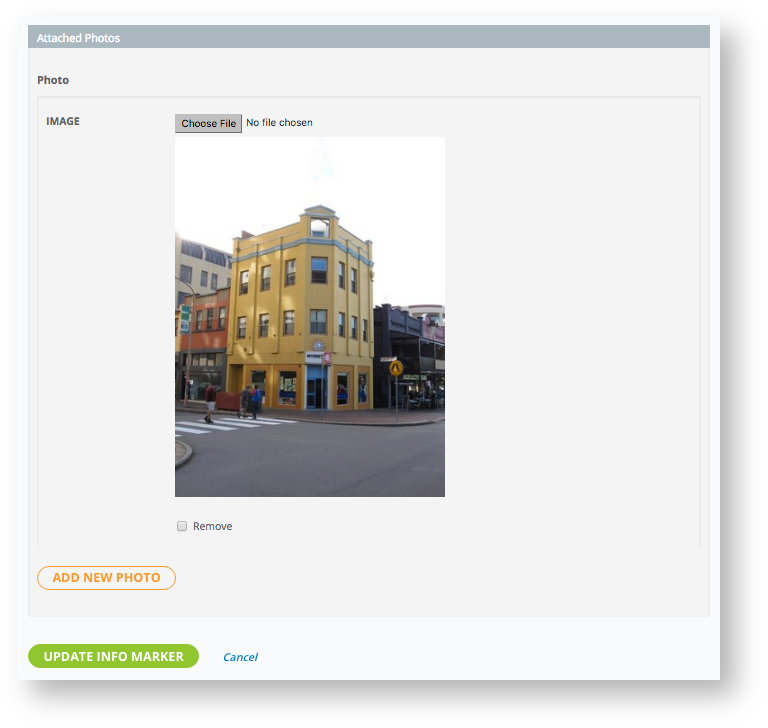
Attached Photos: add/edit or remove photos to the pop-up.
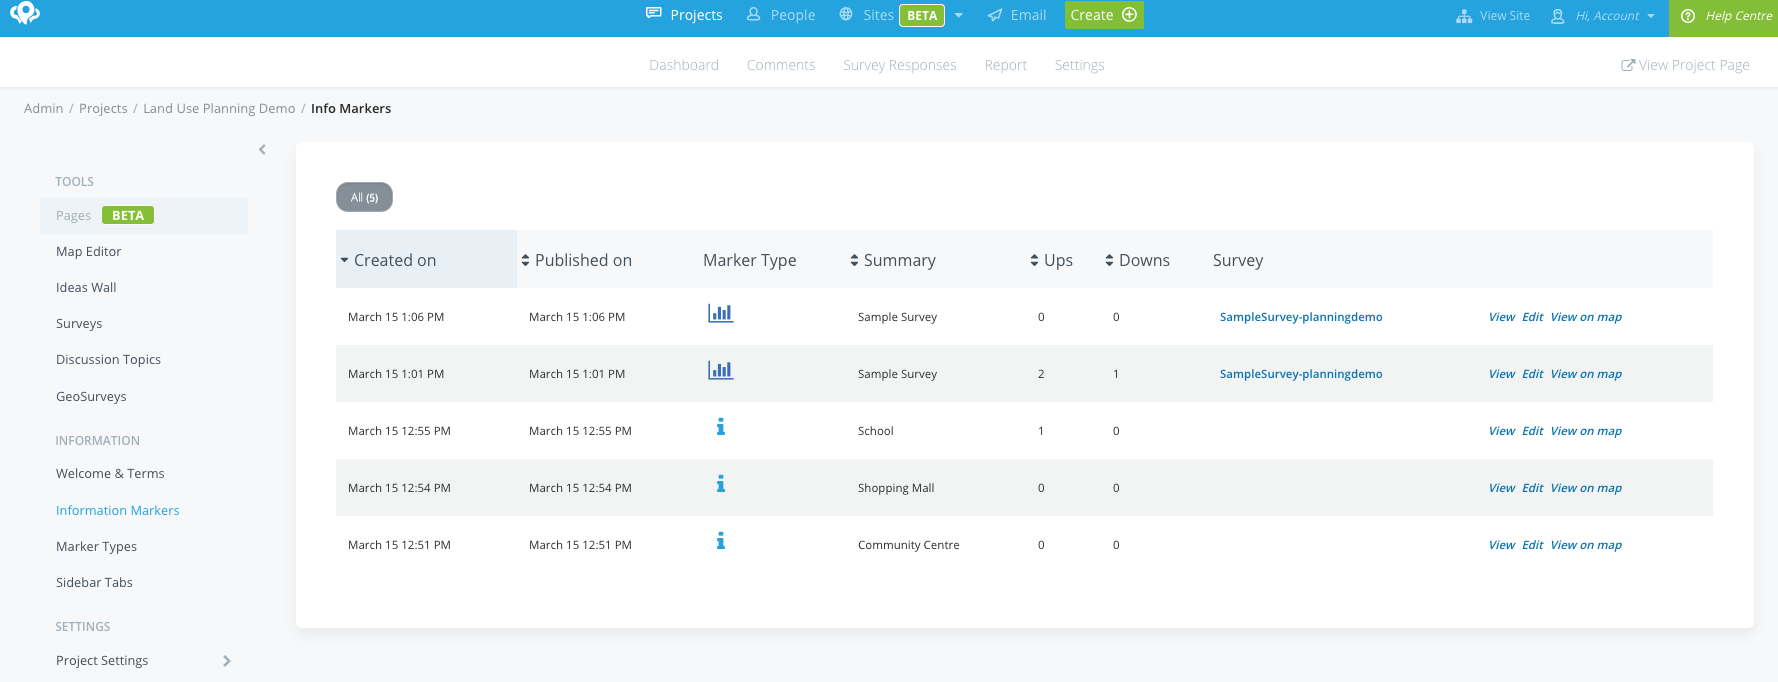
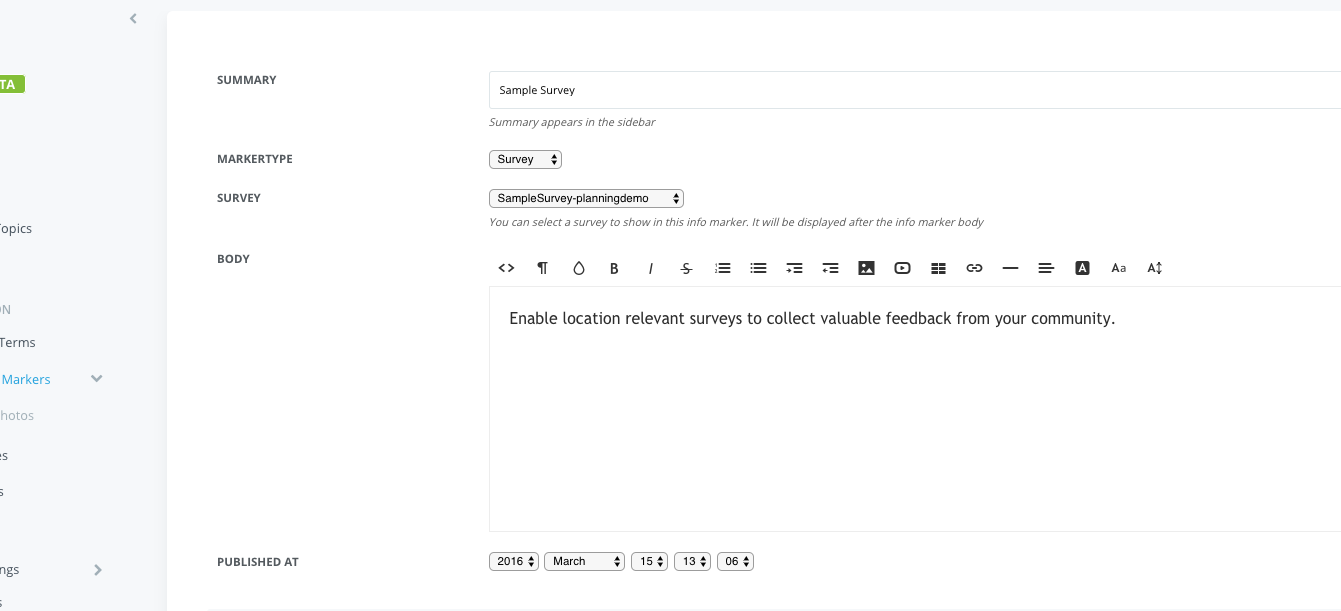
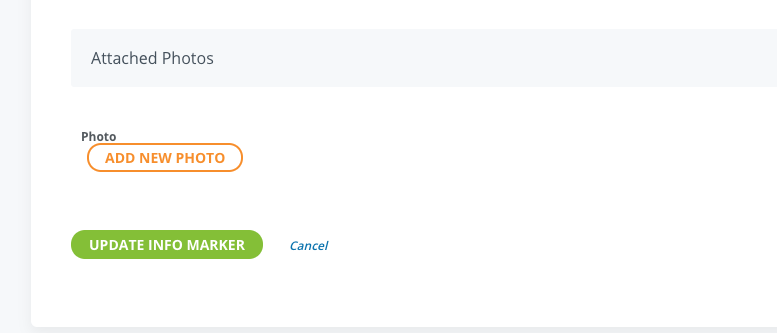
Photo Options
Select Add New Photo, then select Choose File. Once you have uploaded your Photo select 'Update Info Marker'.
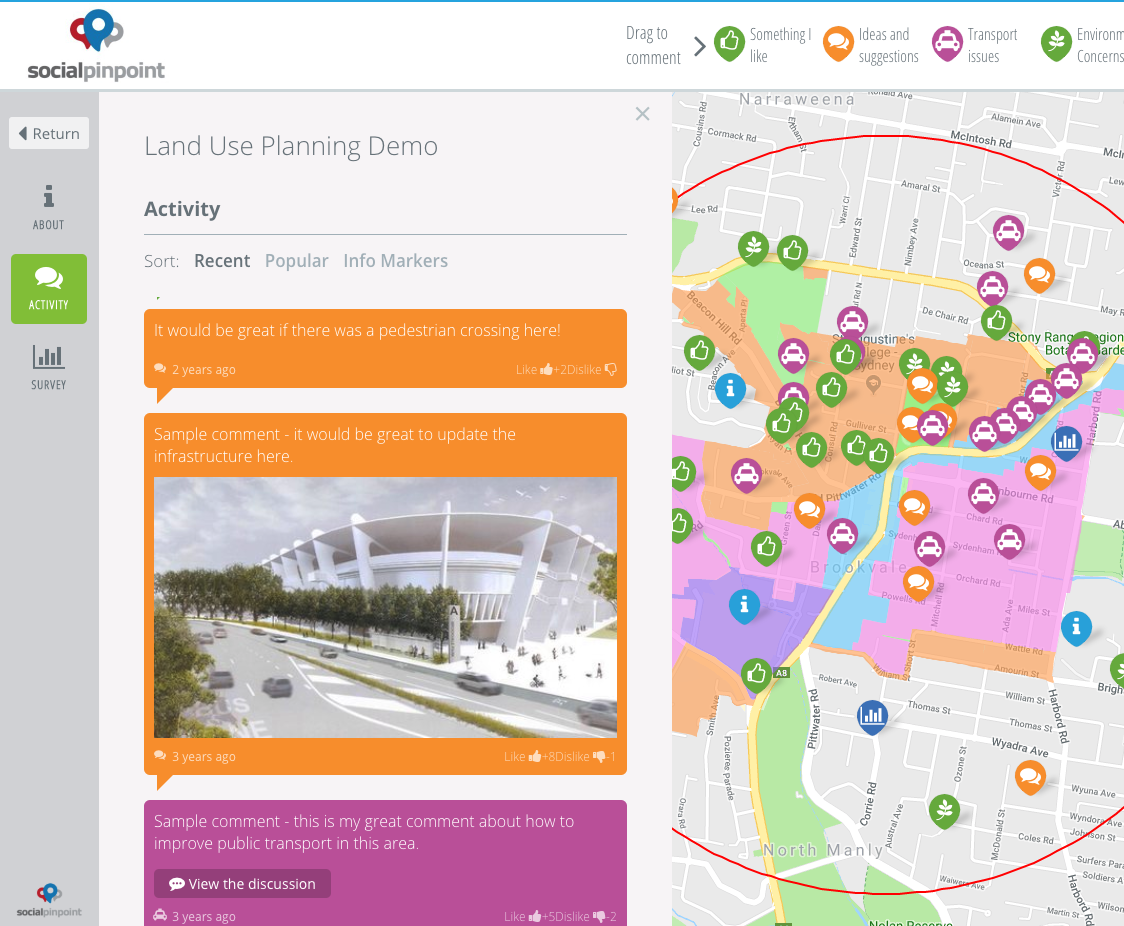
Once configured your Marker Types will be displayed under Activity Feed on the left sidebar of the main Social Pinpoint mapping page, to see all Info Markers you can sort by Info Markers.
For Standard and Enterprise Subscriptions more than 6 Marker Types can be added to a Project.
The workflow for a user to add a pin is different to the above. The below screenshots show the process
-
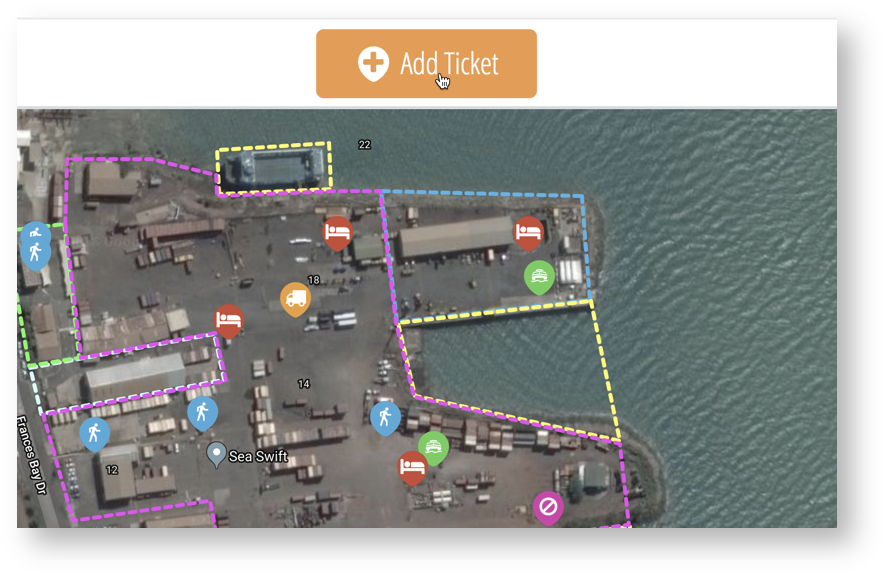
The user clicks the 'Add' button at the top of the screen
-
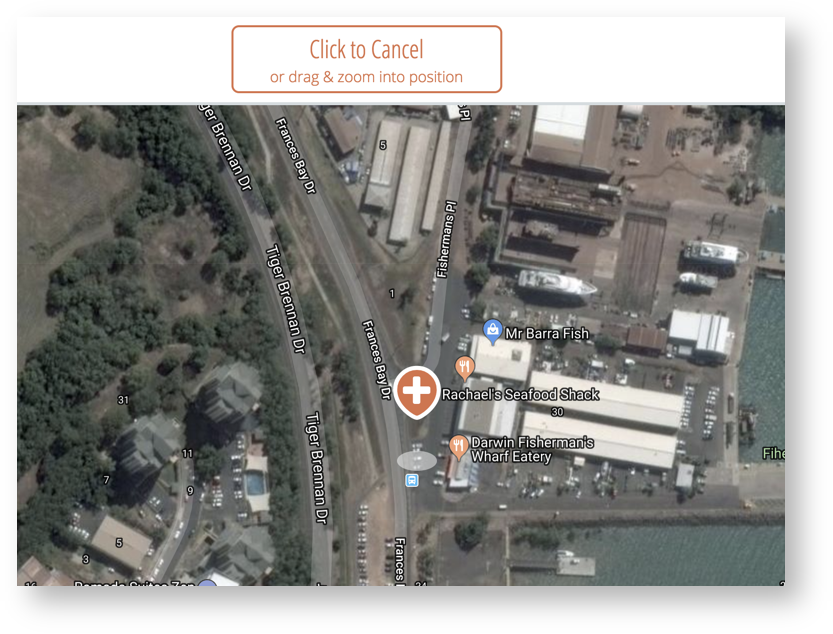
They drag the map to position the marker in the desired spot
-
They click 'Position Marker Here'
-
They then can see all the Marker Types they can choose from. Clicking one will then allow them to add their comment
The user clicks the 'Add' button at the top of the screen
They drag the map to position the marker in the desired spot
They click 'Position Marker Here'
They then can see all the Marker Types they can choose from. Clicking one will then allow them to add their comment
ℹ️ This same process of adding a pin is also how pins are added on mobile devices.
