Project Setup - GeoSurvey
How to configure the GeoSurvey settings for your project(s).
ℹ️ GeoSurvey combines the workflow of surveys with interactive mapping to provide a truly powerful engagement tool. GeoSurvey workflow steps can be linked to various actions in Social Pinpoint to change the zone/ layer visibility and map position and zoom settings.
To add new or configure your existing Social Pinpoint map:
-
Log in to your Social Pinpoint Admin site
-
Follow the guide below to configure the various settings and options.
Log in to your Social Pinpoint Admin site
Follow the guide below to configure the various settings and options.
Select a current project using the edit button on the Welcome Screen or create a new project and then head to your "Dashboard"

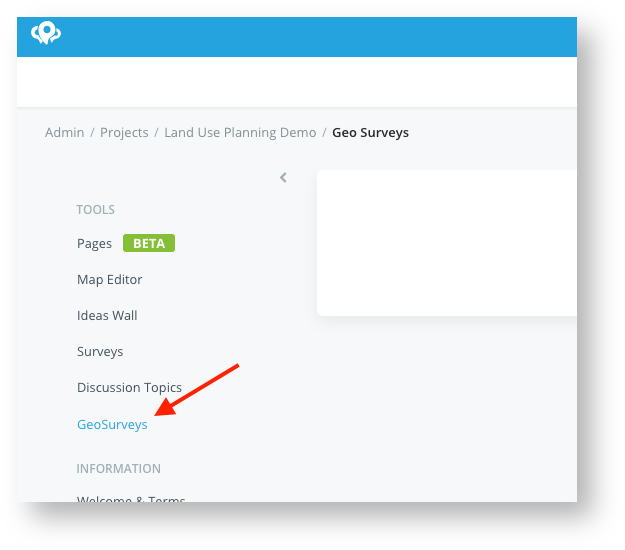
Click GeoSurveys from the Tool Settings menu on the left
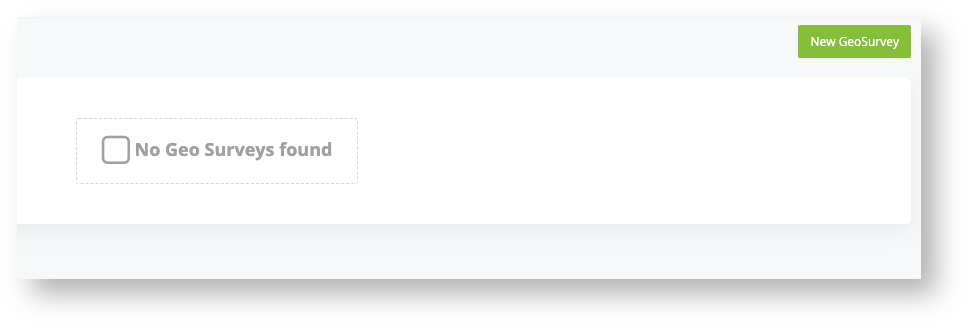
Then select "New GeoSurvey"


Details
Name: Enter a name for your GeoSurvey workflow
Filter markers by GeoSurvey step: Enables the ability to associate comments dropped to the particular GeoSurvey Step they were dropped on. These comments are then NOT visible when looking at another GeoSurvey step. This is particularly useful for projects that want to display multiple design options as you can now clearly show what comments are associated with what design option. Switching between design options will change to the set of comments specific to that design option
⚠️Note: You can only create one GeoSurvey workflow per project. You must save the GeoSurvey before adding workflow steps.
Click Add New GeoSurvey Step

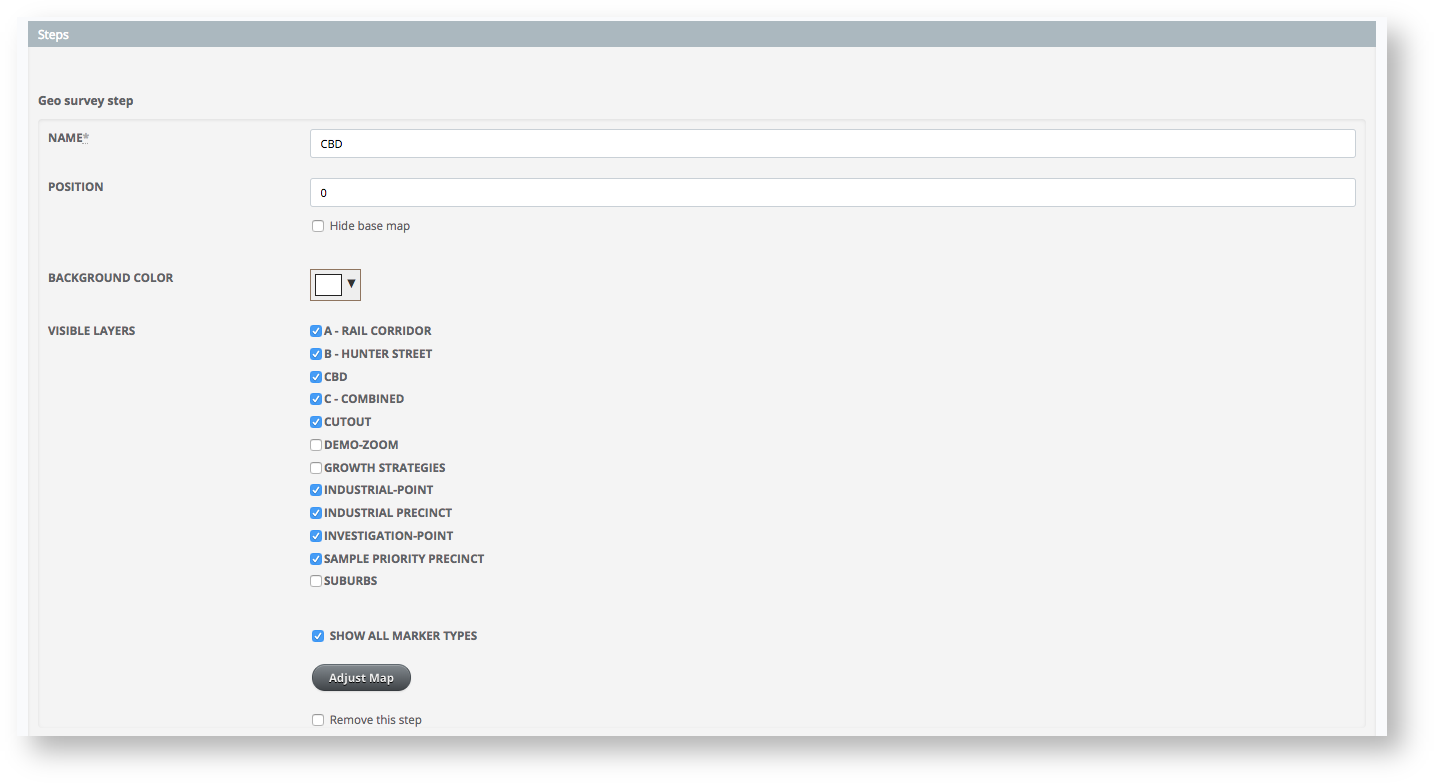
Steps
Name: Provide a name for the workflow step
Position: Determines the order of the workflow. The lowest numbered step will be used for the initial project view
Hide Base Map: Allows you to hide the base map when this step is active. Particularly useful for displaying an underground or inside area.
Background Colour: If the base map is hidden, this will be the colour of the background of the map area.
Visible Zones: Highlight the zones that you wish to make visible for the workflow step
Show all Marker Types: You can toggle this off to then select a subset of marker types to show when this GeoSurvey step is active
Adjust map: Click to open map editor to change the map position, initial zoom, min and max zoom for the step
Remove this step: Tick to delete the selected workflow setup
Remove: Delete entire workflow step
Add new GeoSurvey Step: Click to add additional workflow steps
Click Update GeoSurvey to save

Once created; GeoSurvey workflow steps can be linked to various actions in Social Pinpoint to change the zone/ layer visibility and map position and zoom settings.
If a GeoSurvey setup exists; the initial display of the project map will use the zone visibility and map settings for the lowest numbered workflow step.
You can also:
Link GeoSurvey step to Zone Click: Edit an existing Zone and set the Zone select action to the Navigate to GeoSurvey Step option, then select the desired step to be displayed on clicking
Link GeoSurvey step to Survey Submit: Edit an existing Survey and set the Survey submit action to Submit then Navigate to GeoSurvey Step, then select the desired to to be displayed on submitting
Link GeoSurvey step to Sidebar Tab: Linking a GeoSurvey step to a Sidebar Tab is a useful tool if you want the ability to enable/disable layers to display different designs or phases for comment. For further detail on how to setup Sidebar Tabs please see Project Setup - Sidebar Tabs
Link GeoSurvey Workflow to Zone Click action

Link GeoSurvey Workflow to Survey Step

